Do you have a great video, but only people who speak the same language can understand it?
If you create YouTube videos, online courses, tutorials, podcasts, or social media content, language can become a real barrier. A video that performs well in one language may have the potential to reach a much larger audience if it is translated and dubbed into other languages.
In the past, this process was expensive and time-consuming. You usually had to hire a translator, record a new voiceover, edit the audio, add subtitles, and export the video again.
Today, AI can help simplify most of this workflow.
In this guide, I will show you how to:
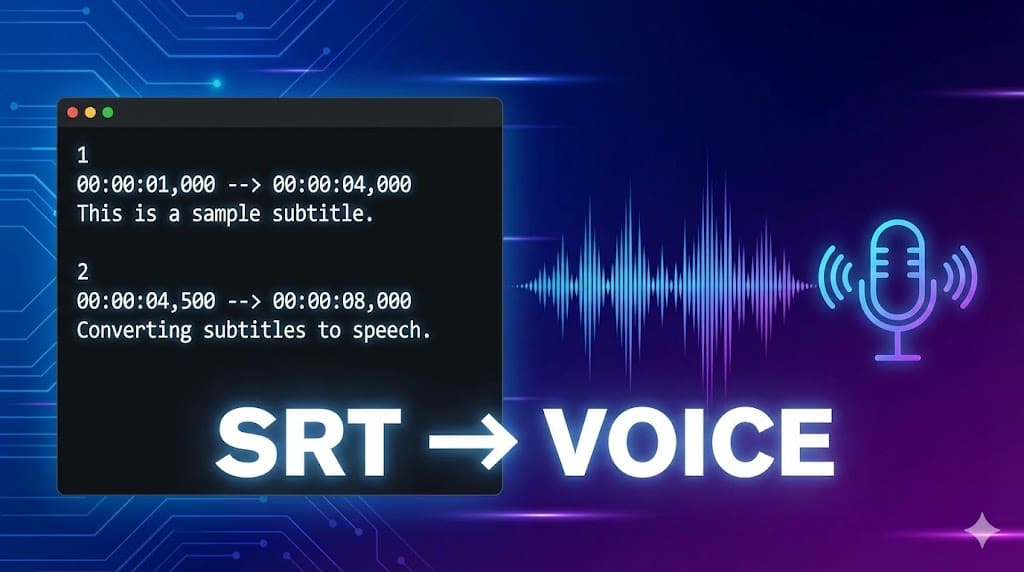
- Extract subtitles from a video
- Translate subtitles into another language
- Generate AI voiceover from the translated subtitles
- Use CapCut to remove the original voice, import the new AI audio, add translated captions, and export a dubbed video
You can follow this workflow manually, or use an automated video localization workflow if you want to process everything faster.
Video Tutorial
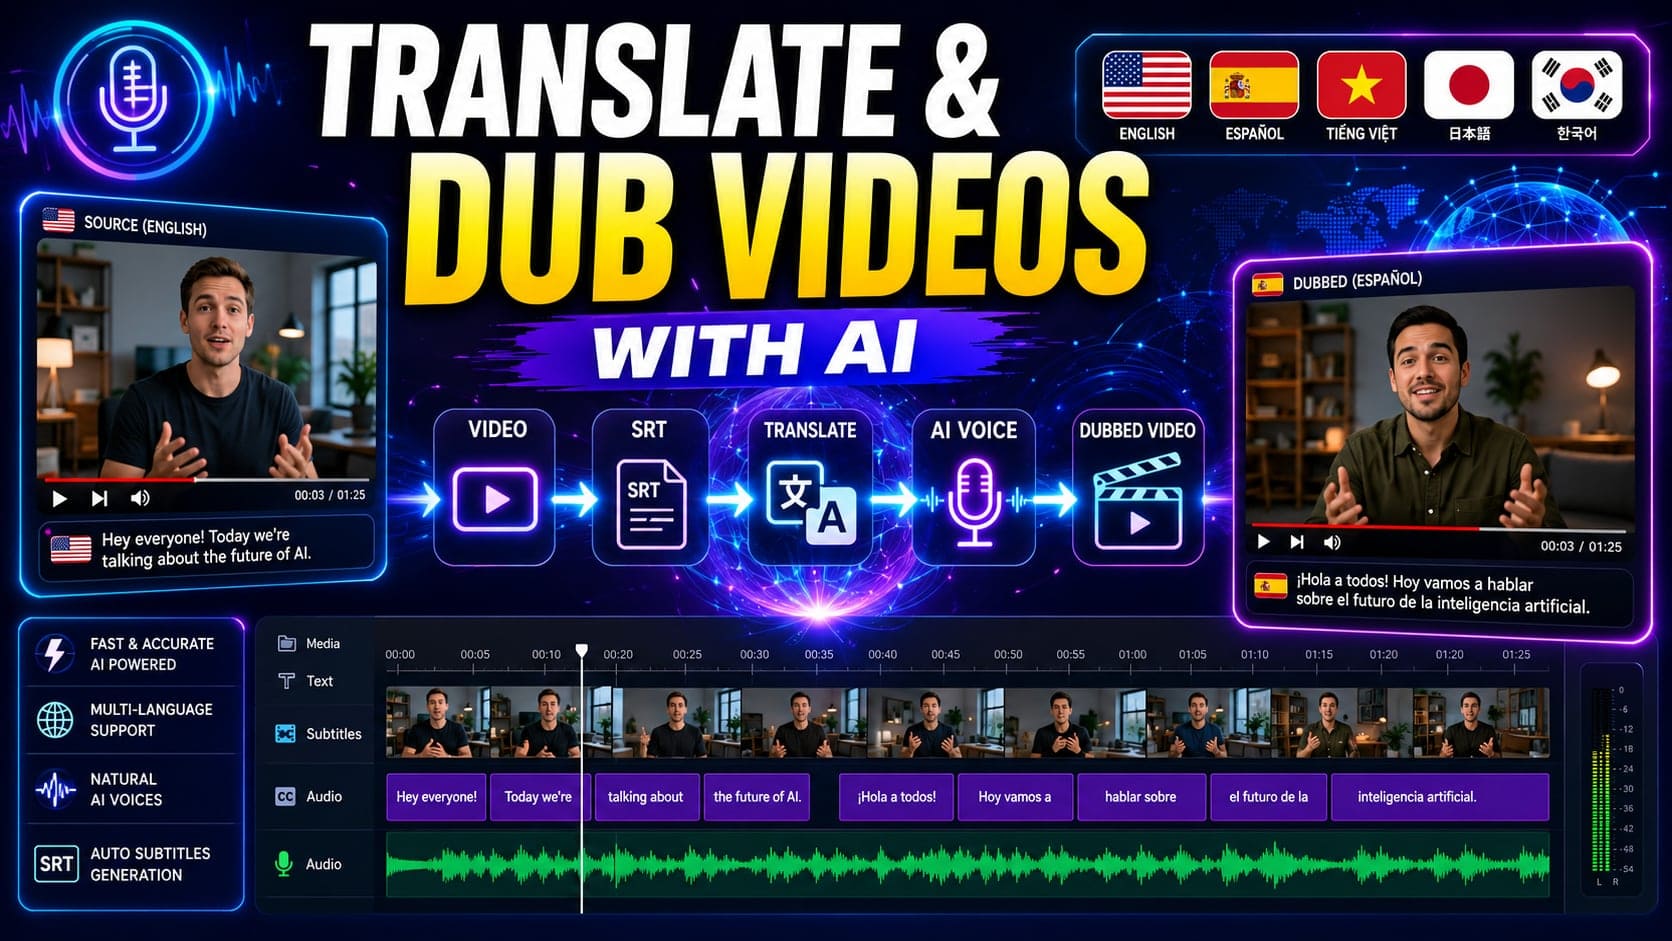
What Is AI Video Dubbing?
AI video dubbing is the process of using artificial intelligence to translate the spoken content of a video and generate a new voiceover in another language.
A basic AI dubbing workflow usually includes:
- Extracting the speech from the original video as subtitles
- Translating the subtitles into another language
- Converting the translated subtitles into AI voice
- Replacing or mixing the original audio with the new voiceover
- Adding translated captions to the final video
This makes it easier for creators to turn one video into multiple language versions without recording everything again from scratch.
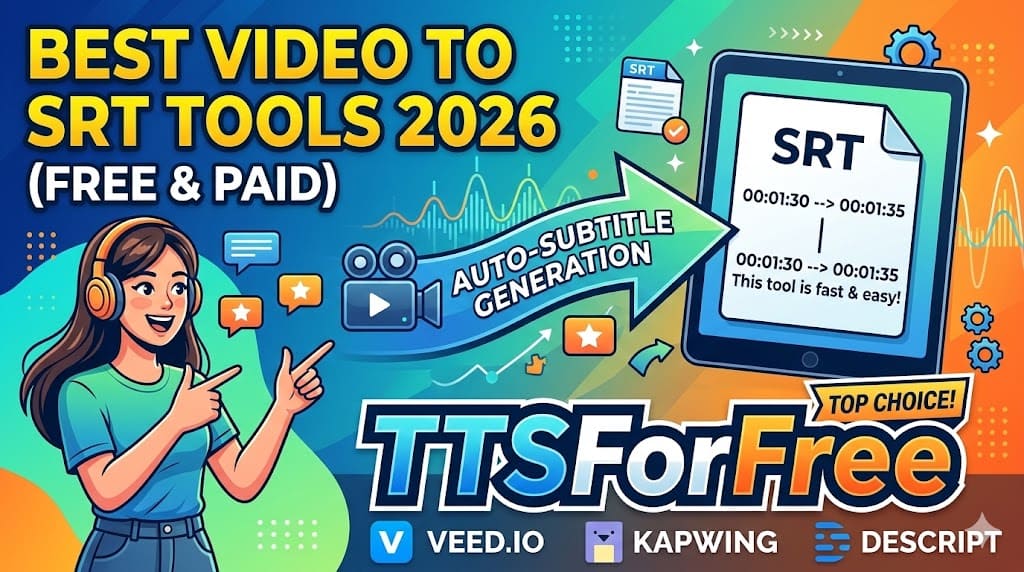
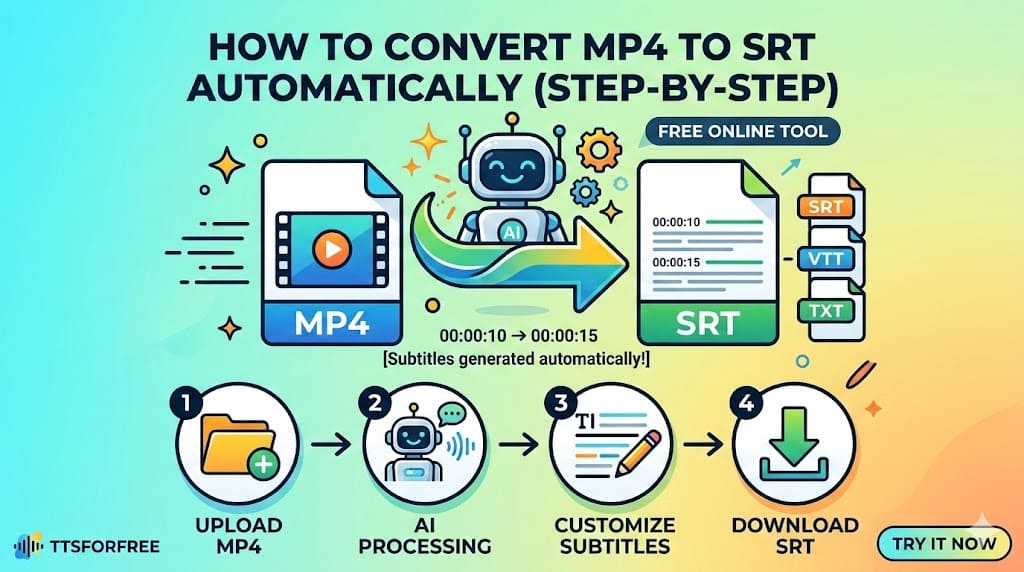
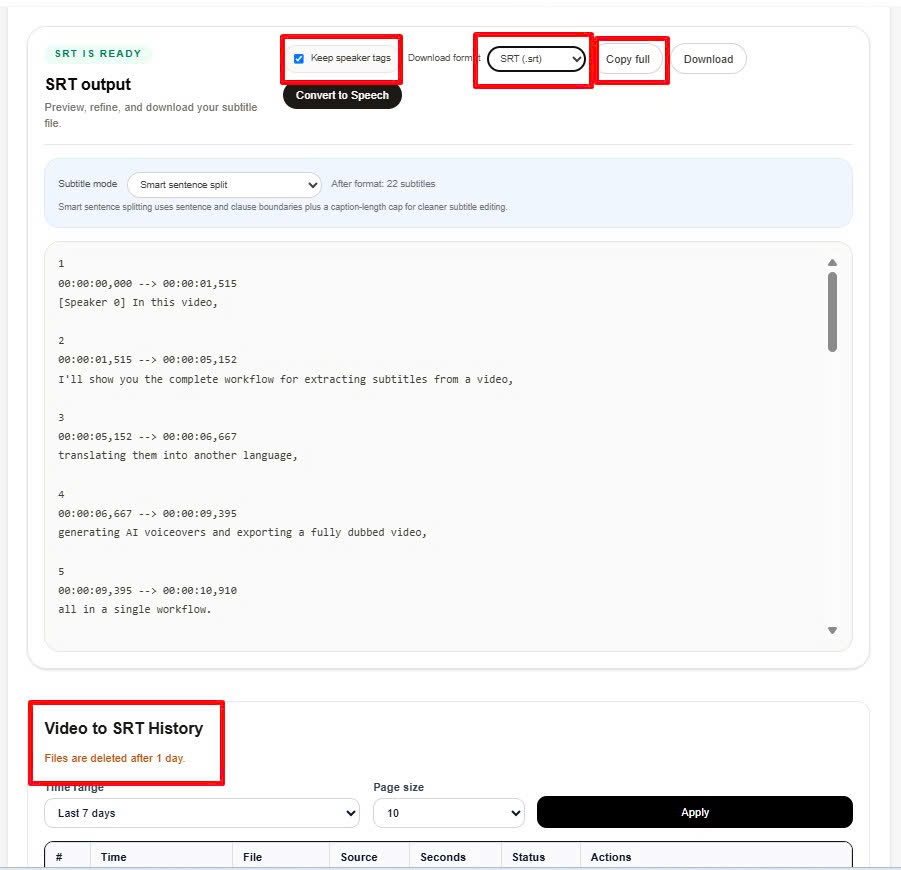
Step 1: Extract Subtitles from Your Video
The first step is to convert the spoken content of your video into subtitles.
To do this, go to the Video to SRT tool and upload your video.
After uploading the video, choose the source language. For example, if your original video is in English, select English as the source language.
Depending on your video, you may have different extraction modes available.
Fast Mode
Fast Mode is useful when you want to extract subtitles quickly. It is a good choice for simple videos or when you want to test the workflow before spending more time editing.
Better Mode
Better Mode is useful when your video has one main spoken language and you want better transcription quality.
Speaker Detection Mode
Speaker Detection Mode is helpful when your video has multiple speakers. The system can detect different speakers and mark them as Speaker 0, Speaker 1, and so on.
This is useful if you want to assign different AI voices to different speakers later.
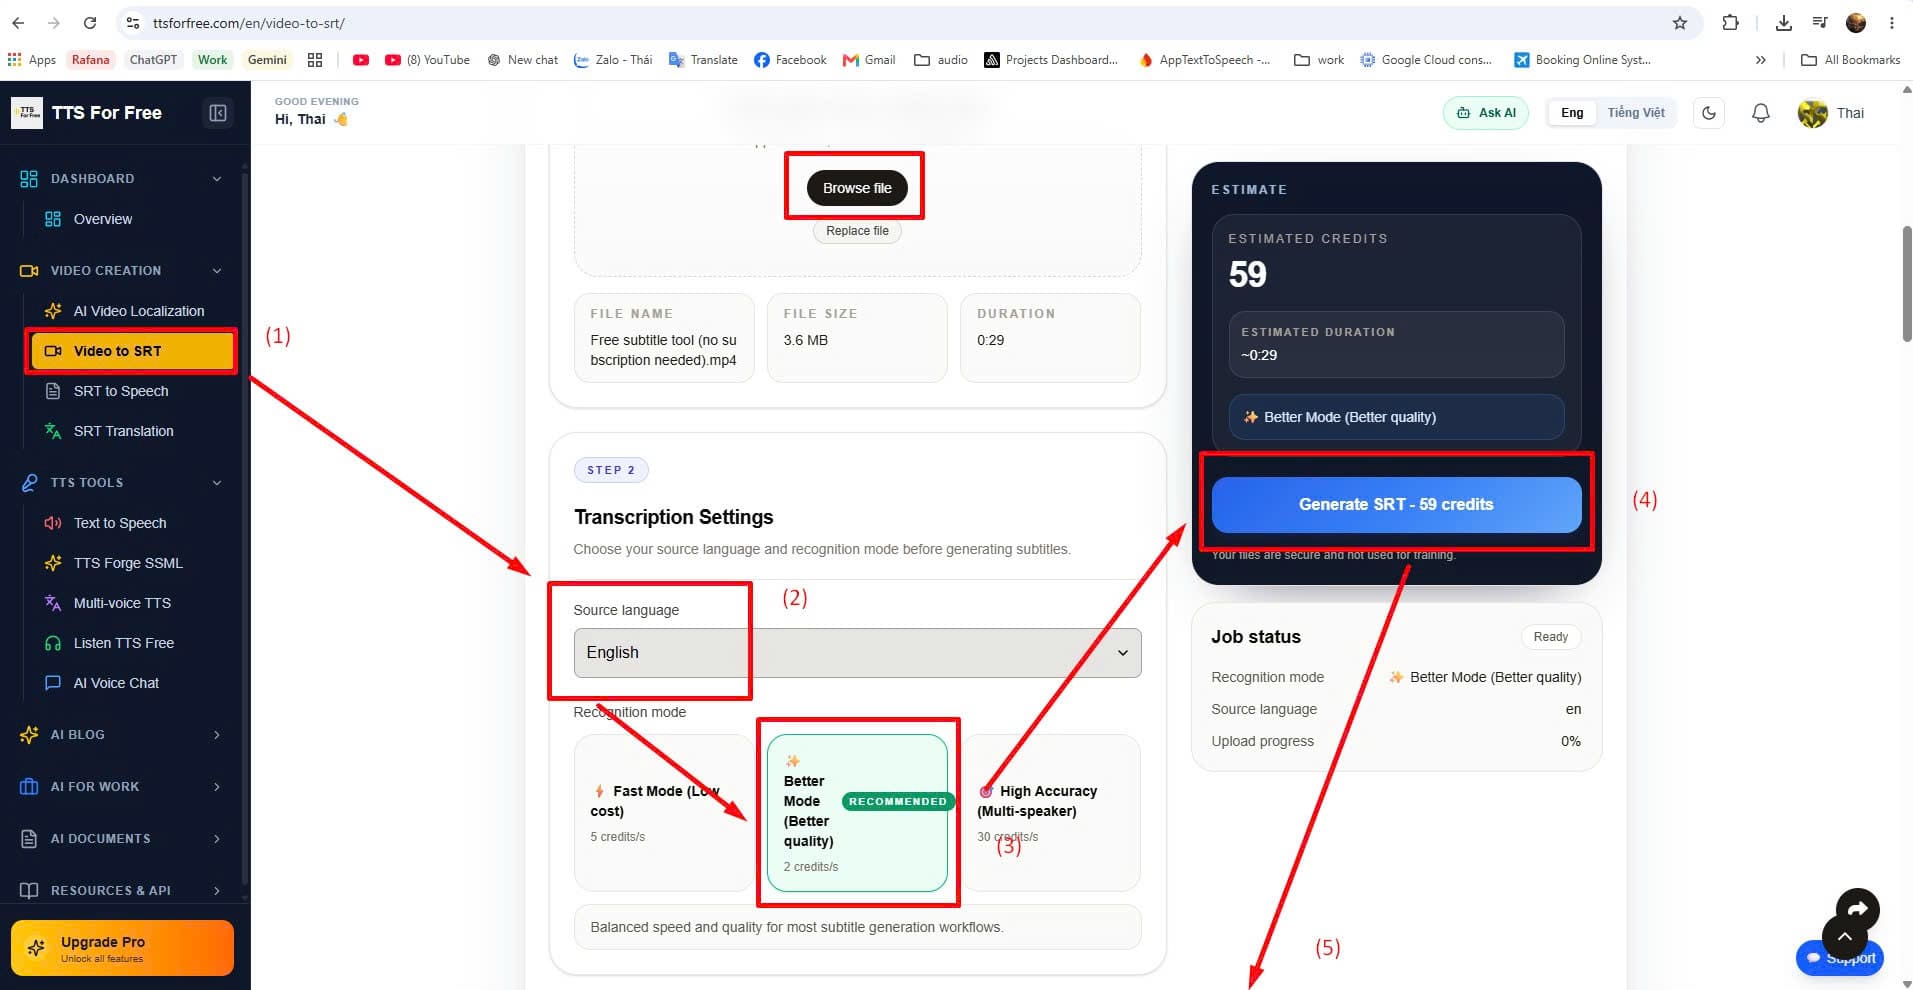
Once everything is ready, click Generate.
After the process is completed, you will get an SRT subtitle file. You can download the SRT file or copy the full subtitle text for the next step.
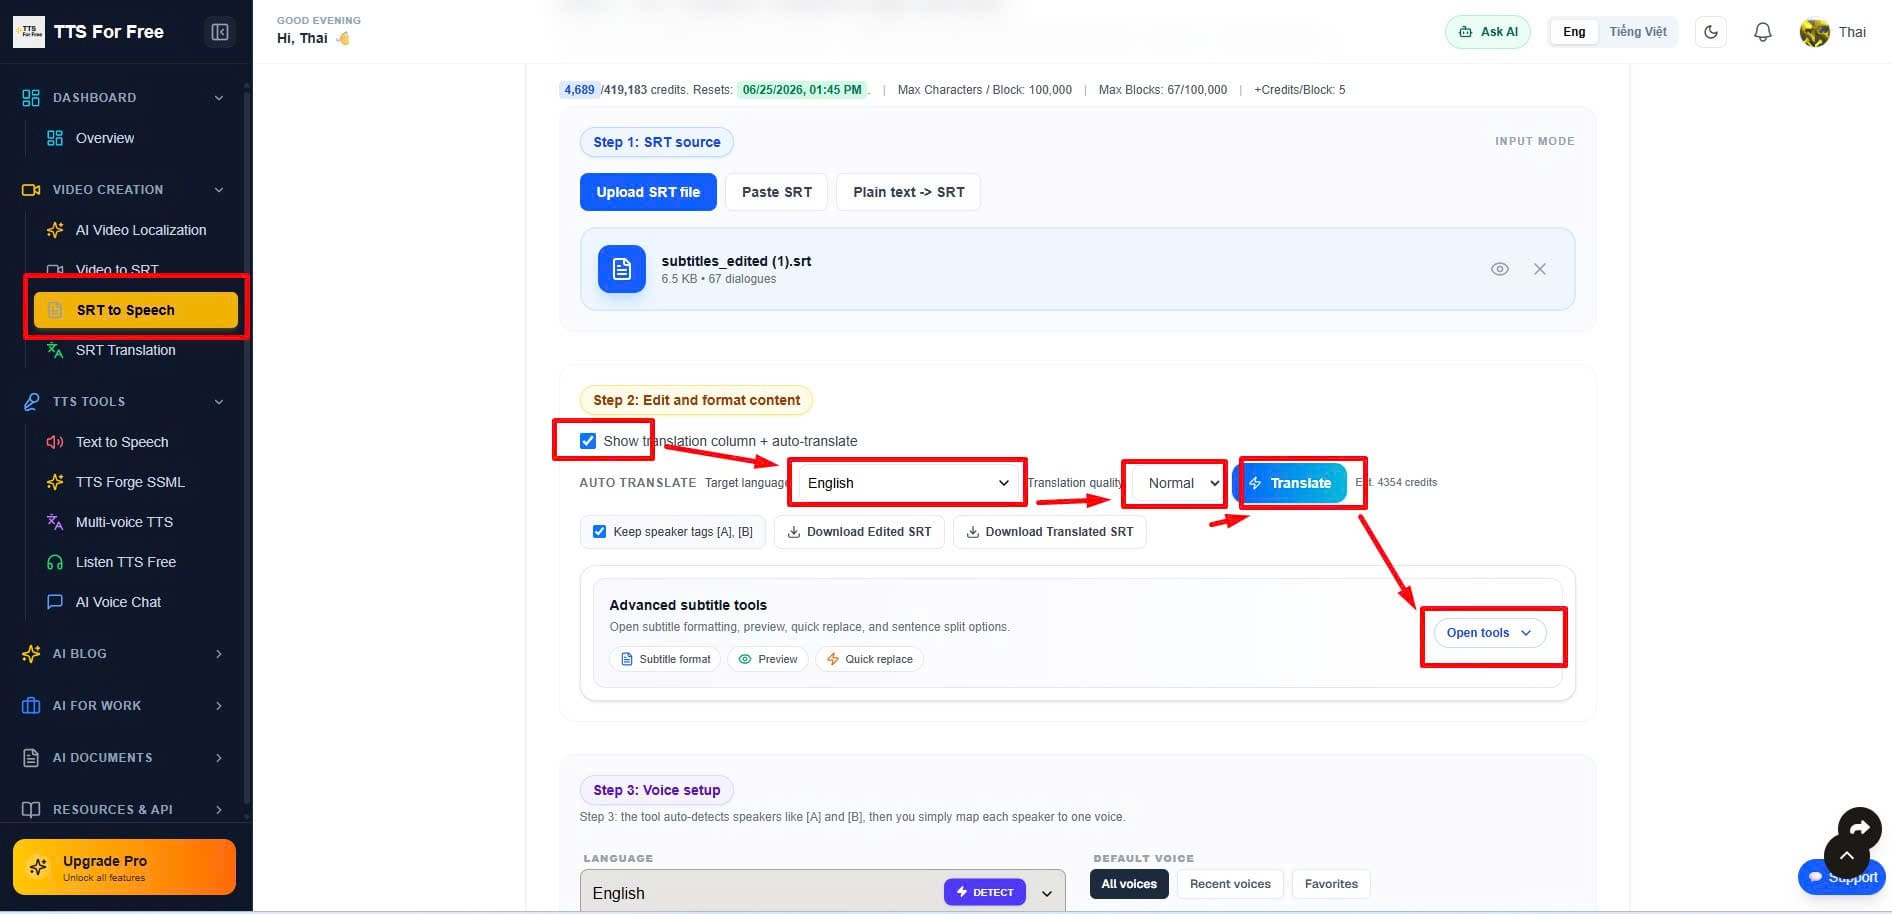
Step 2: Translate the Subtitles
After extracting the subtitles, the next step is translation.
Go to the SRT to Speech tool and paste the extracted SRT content into the editor.
If you want to translate the subtitles, enable the translation option.
Then choose:
- The original language
- The target language
- The translation mode
For example, you can translate:
- English to Spanish
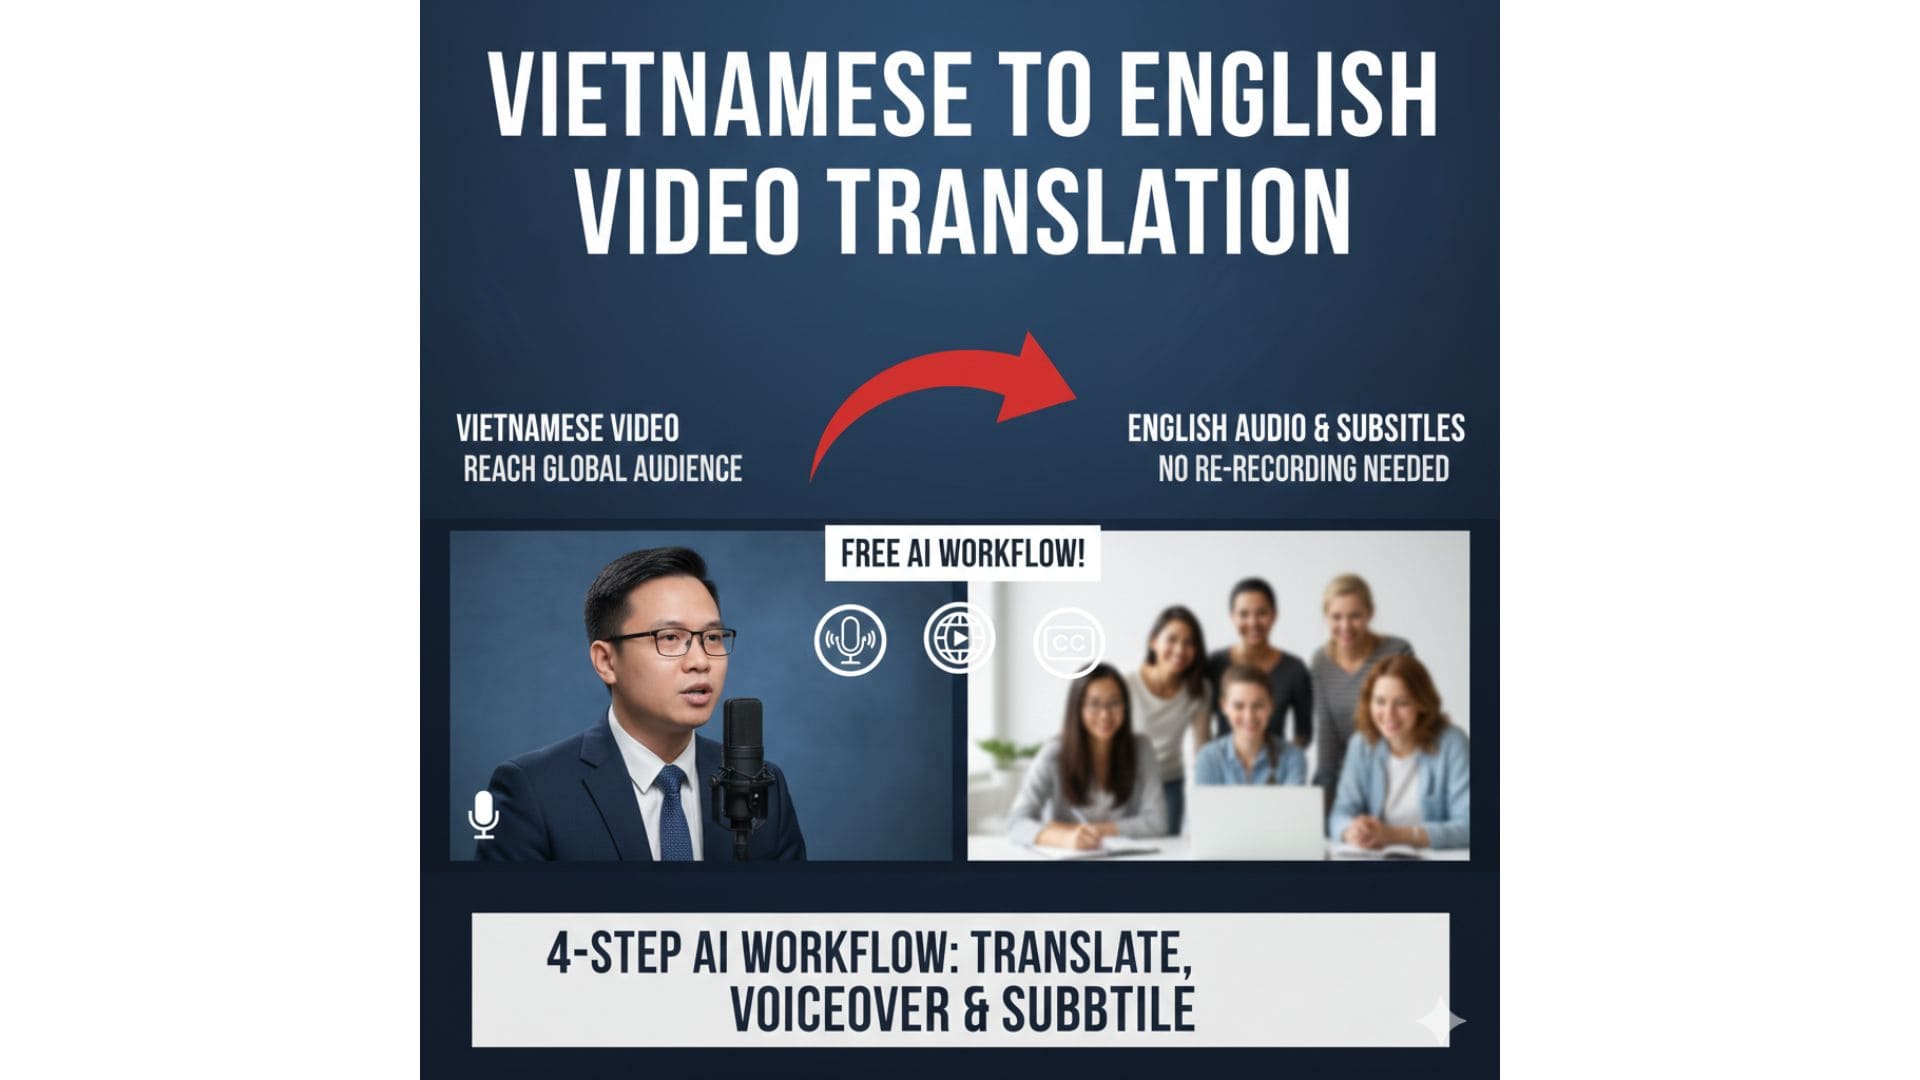
- Vietnamese to English
- Japanese to Vietnamese
- Korean to English
After choosing the target language, click Translate.
The AI will translate the subtitle content while keeping the subtitle structure and timestamps.
Before moving to the next step, it is a good idea to review the translated subtitles quickly. This helps make sure that names, technical terms, product names, and important phrases are translated correctly.
When you are satisfied with the translation, download the translated SRT file.
Step 3: Generate AI Voiceover from the Translated SRT
Now that you have the translated subtitles, you can turn them into an AI voiceover.
In the SRT to Speech tool, select an AI voice that matches your target language.
For example, if your translated subtitles are in Spanish, choose a Spanish AI voice.
If your video has multiple speakers, you can assign different voices to different speakers.
For example:
- Speaker 0: Male Spanish voice
- Speaker 1: Female Spanish voice
This helps make conversations or multi-speaker videos sound more natural.
After selecting the voice, click Start Conversion.
The system will generate an audio file based on your translated subtitles.
When the process is finished, download the AI voiceover audio file.
At this point, you should have three important files:
- The original video
- The translated SRT subtitle file
- The AI-generated voiceover audio
Next, you can use CapCut to combine them into a final dubbed video.
Step 4: Edit the Dubbed Video in CapCut
After completing the first three steps, open CapCut and create a new project.
This is where you will replace or reduce the original voice, import the AI voiceover, add translated captions, and export the final dubbed video.
Import the Original Video
First, import your original video into CapCut.
Drag the video into the timeline.
This will be the base video that you use for the final dubbed version.
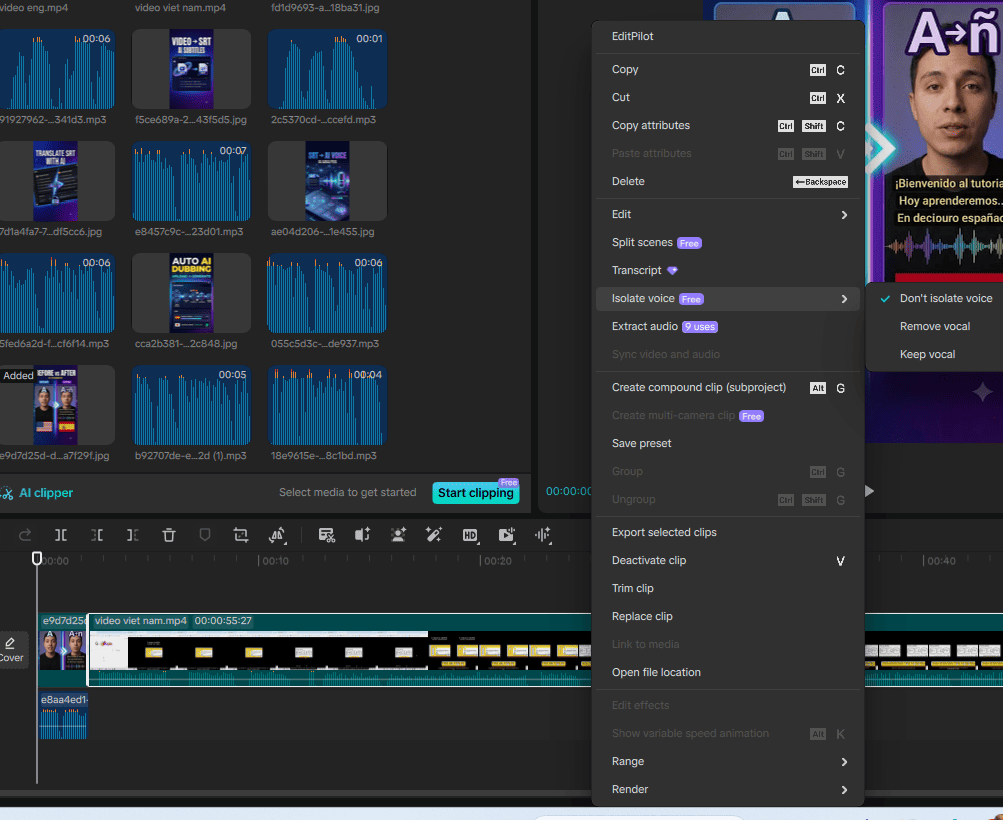
Remove the Original Voice
Next, select the video in the timeline.
Use CapCut’s voice removal feature, such as Remove Vocal, to reduce or remove the original spoken voice.
This step is useful because you do not want the original voice and the new AI voiceover to overlap too much.
In many cases, removing the vocal can help keep the background music or ambient sound while reducing the original speech.
After removing or reducing the original voice, listen to the video again to make sure the background sound still feels natural.
Import the AI Voiceover Audio
Now import the AI-generated audio file into CapCut.
Drag the audio file into the timeline and place it under the original video.
Play the video and check if the new voiceover matches the timing of the video.
If needed, you can adjust:
- Audio position
- Audio volume
- Background music volume
- Timing between the video and the voiceover
The goal is to make the AI voiceover feel natural and easy to follow.
Import the Translated Subtitles
Next, import the translated SRT subtitle file into CapCut.
You can use the caption import feature to add the subtitle file directly.
After importing the captions, check:
- Subtitle timing
- Font size
- Text color
- Subtitle position
- Line breaks
For short-form videos, make sure the subtitles are large enough to read on mobile screens.
For YouTube videos or tutorials, you can use a cleaner subtitle style that does not distract from the screen recording.
Step 5: Export the Final Dubbed Video
Once the video, AI voiceover, and translated subtitles are ready, review the entire video from start to finish.
Before exporting, check:
- Is the new voiceover clear?
- Are the subtitles readable?
- Is the timing correct?
- Is the original voice removed or reduced enough?
- Is the background music too loud?
- Does the final video feel natural?
After checking everything, export the video from CapCut.
Now you have a new version of your video in another language.
You can upload it to YouTube, TikTok, Instagram Reels, Facebook, your course platform, or any other content platform.
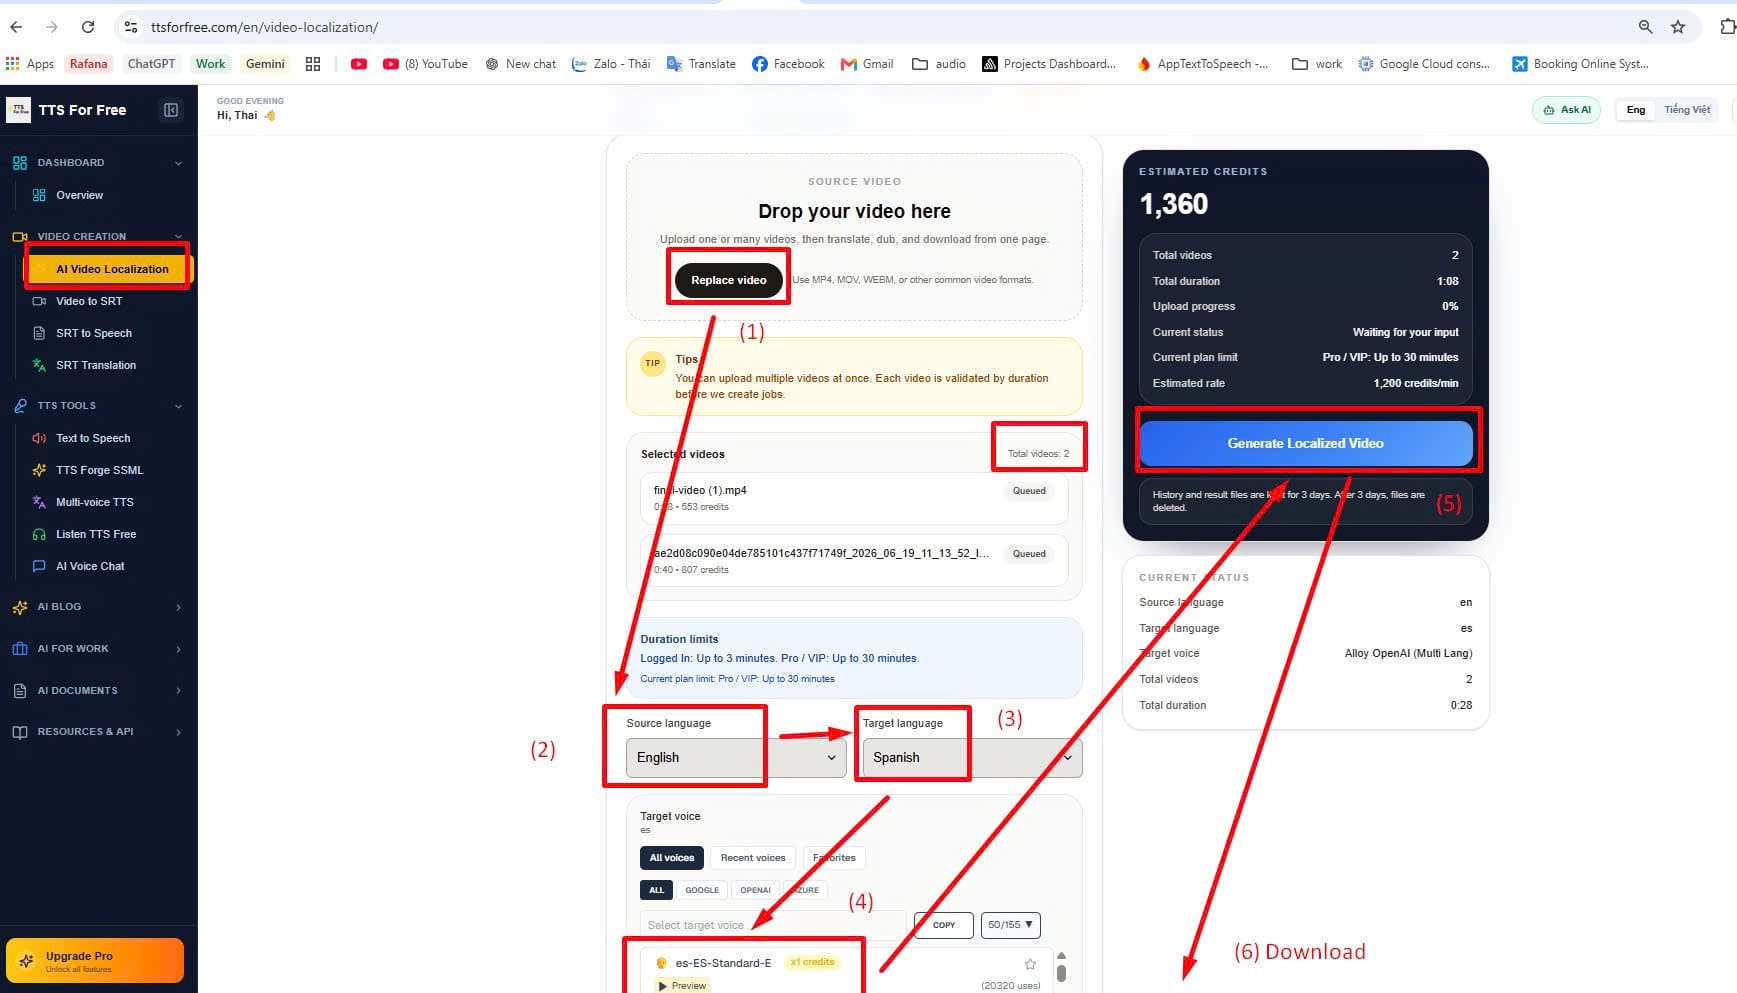
Automating the Workflow with Video Localization
The manual workflow is useful when you want more control over each step.
However, if you do not want to extract subtitles, translate them, generate audio, and edit everything manually, you can use an automated video localization workflow.
With a video localization tool, you only need to:
- Upload your video
- Choose the source language
- Choose the target language
- Select an AI voice
- Click Generate
The system can then process the workflow automatically:
- Extract subtitles from the video
- Translate the subtitles
- Generate AI voiceover
- Create a dubbed video version
This is especially useful if you need to process multiple videos or create content in different languages regularly.
Why Translate and Dub Videos with AI?
AI video translation and dubbing can be useful for many types of creators.
YouTube Creators
If your video performs well in one language, translating and dubbing it can help you reach new audiences in other countries.
Online Course Creators
If you sell online courses, AI dubbing can help you create multilingual lessons without recording every lesson again.
SaaS and Product Teams
If you create product tutorials, AI dubbing can help you localize your tutorials for different markets.
Social Media Creators
Short-form videos can reach global audiences quickly. Translating and dubbing your best videos can help you reuse the same content in multiple languages.
Agencies and Freelancers
If you create video content for clients, AI dubbing can become an additional service you offer.
Best Practices for Better AI Dubbed Videos
AI can make the workflow faster, but the final quality still depends on how you prepare and edit your video.
Here are a few tips:
Use Clear Original Audio
The better the original audio, the better the subtitle extraction result.
Try to avoid videos with too much background noise, overlapping voices, or unclear speech.
Review the Translated Subtitles
AI translation is helpful, but you should still check important terms, names, and brand-related words.
Choose the Right AI Voice
The voice should match the language, tone, and purpose of your video.
For tutorials, choose a clear and easy-to-understand voice.
For marketing videos, choose a more energetic voice.
Check the Timing
Always review the timing between the video, subtitles, and AI voiceover before exporting.
Keep Captions Mobile-Friendly
If you are creating Shorts, TikTok, or Reels, use large captions that are easy to read on a phone screen.
Conclusion
AI makes it much easier to translate and dub videos into other languages.
Instead of manually transcribing, translating, recording, and editing everything from scratch, you can use AI tools to speed up the process.
A simple workflow looks like this:
- Extract subtitles from your video
- Translate the subtitles
- Generate AI voiceover
- Use CapCut to remove the original voice, import the new AI audio, add translated captions, and export the final video
If you want more control, you can do the process step by step.
If you want to save time, you can use an automated video localization workflow to handle most of the process for you.
This workflow is useful for YouTube creators, online course creators, SaaS tutorials, podcasts, and social media content.
With the right workflow, one video can become multiple language versions and reach a much larger audience.